How to Use the Data Upload Tool
Learn step by step how to upload your own data as CSV, KML/KMZ to SparkMap’s Map Room. Pro and Premium SparkMap Subscribers can use the Data Upload Tool. Want to learn more about subscription options? Visit our Pricing Page.
Prepare Your Data
Upload Your Data
Edit Your Map Settings
Compare & Share Data
Step 1 – Prepare Your Data
Prepare your data in a CSV, KML, KMZ, or compressed ESRI Shapefile. Label all columns of your files.
Then navigate to the “Data Upload” Tool in the Map Room (Figure 1).
Step 2 – Upload Your Data
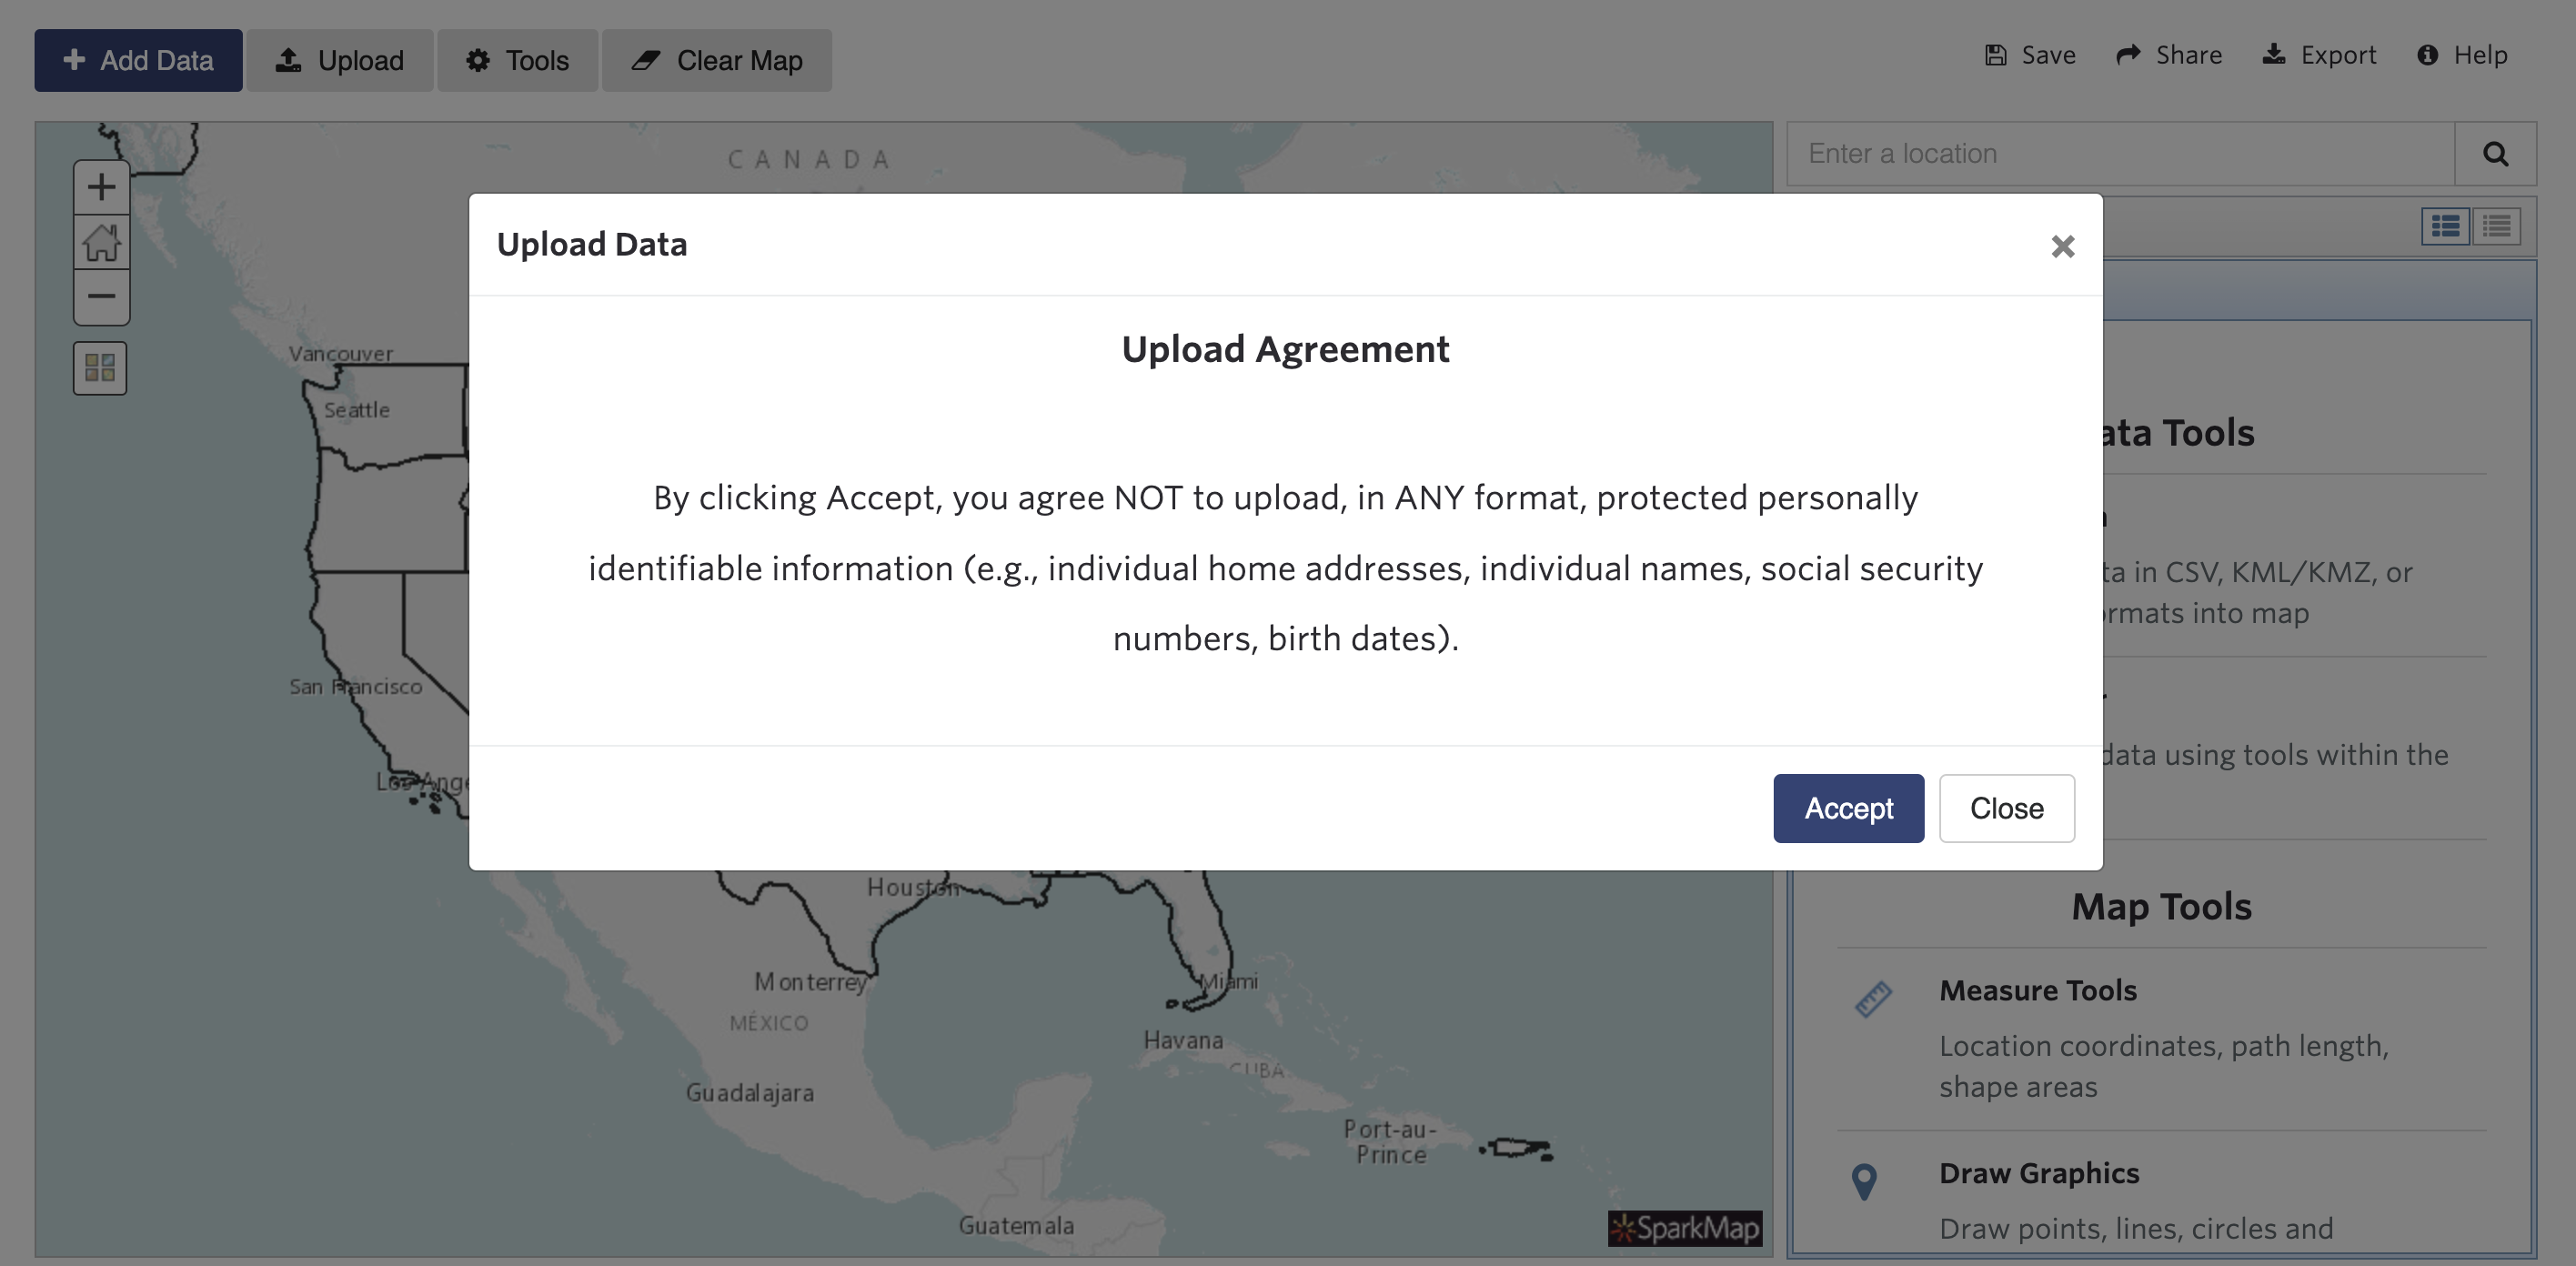
When the data upload popup appears, select CARES’ terms and conditions. Then, drop or click to select a file from your device (Figure 2).
Once the data uploads, the popup will prompt you to choose your geography type and your intended data categories. Note that the data categories from your uploaded file have integrated into the tool. After setting your categories of interest, click the “Submit” button at the bottom right corner of the popup.

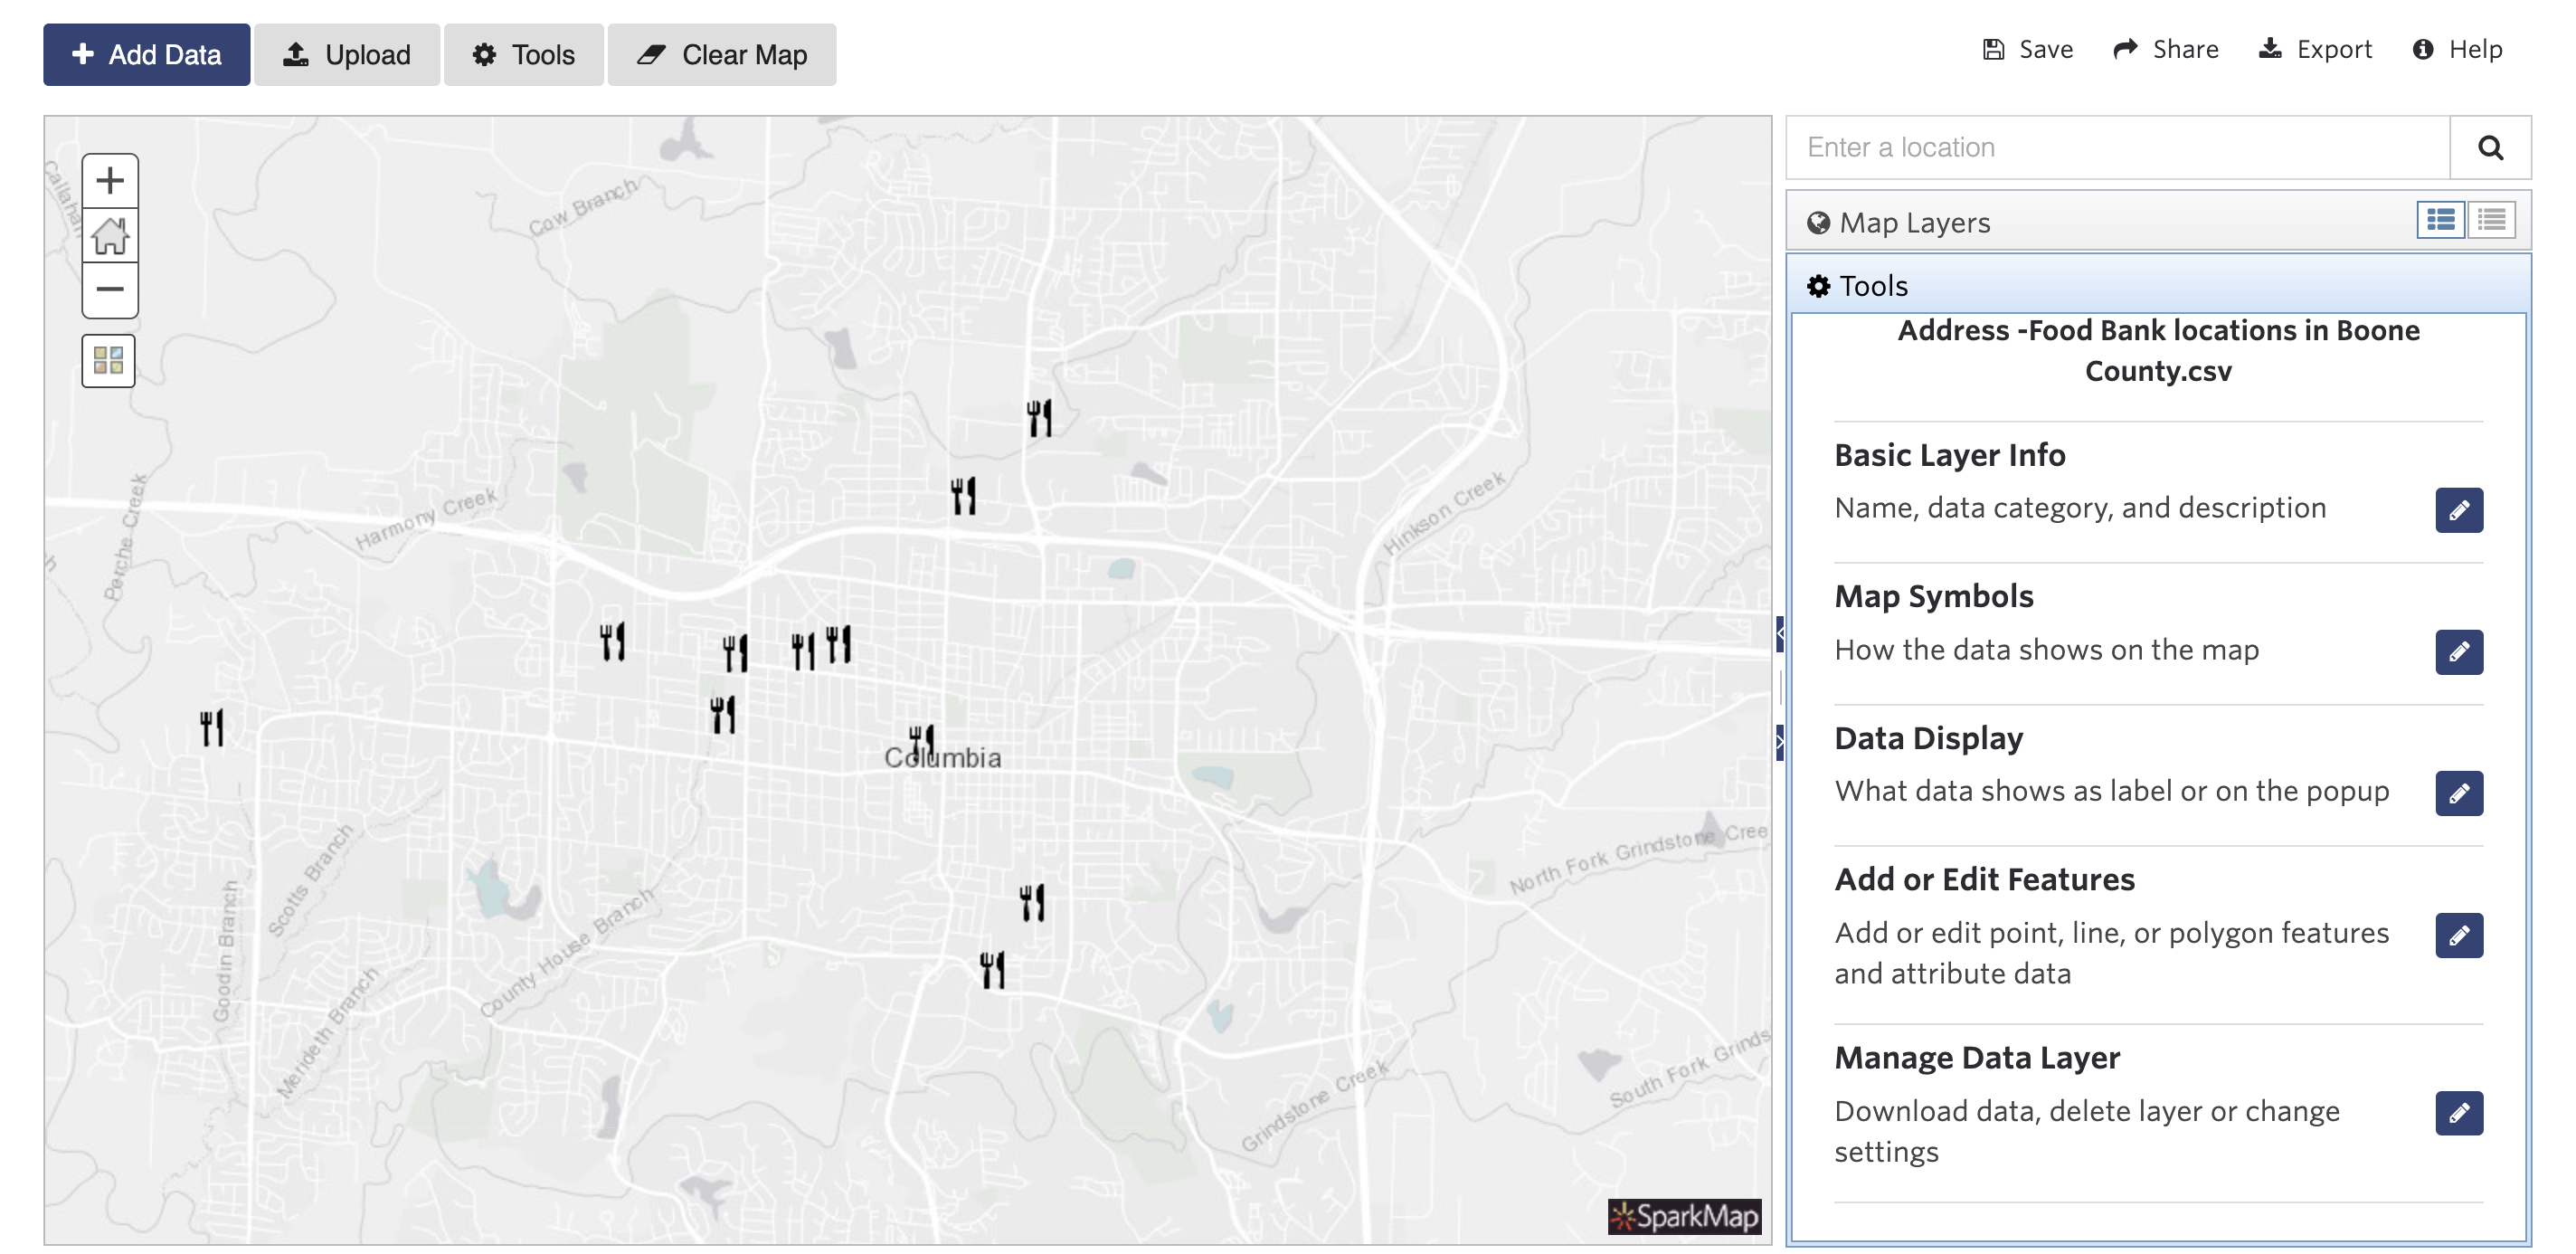
Step 3 – Edit Your Map Settings
Using the “Data Editor” tool on the right side of the Map Room, you can change the layer’s characteristics (Figure 3).
Clicking on “Basic Layer Info” allows edits to the layer’s name, data category, and description of the data layer.
You can also change the map symbols and the color to fit your needs under “Map Symbols” and change what attributes to show and rename them under “Data Display.”
Using the “Data Editor” tool on the right side of the Map Room, you can change the layer’s characteristics (Figure 4). Clicking on “Basic Layer Info” allows edits to the layer’s name, data category, and description of the data layer.
You can also change the map symbols and the color to fit your needs under “Map Symbols,” and change what attributes to show and rename them under “Data Display” (Figure 5). Finally, you can add or edit features (e.g., points, lines or polygons) and you can manage the layer by downloading or deleting it (Figure 6).